GUIDE18 september 2020
Rich Text weergeven op Android met de Contentful SDK
Leer hoe je Contentful Rich Text weergeeft in je Android-app met de officiële SDK. Beheer eenvoudig opmaak, ingesloten assets en custom renderers.
Inleiding
Contentful is een CMS waarmee je eenvoudig content kan verspreiden naar allerlei platformen waaronder websites, iOS en android apps. Het voorziet een eenvoudig te gebruiken web app waar je je content kan beheren en doorsturen naar al je platformen. De content die je wil aanbieden, kan een van vele vormen zijn, elk met zijn eigen doel.
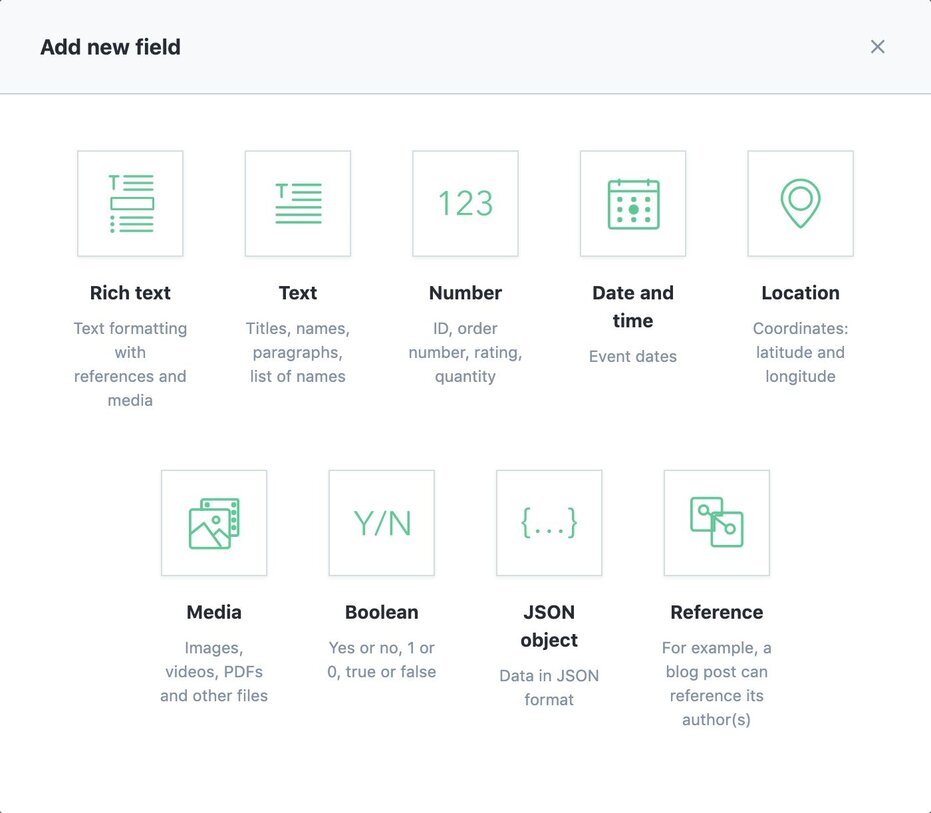
Rich Text
Eén van de contenttypes is Rich Text. Hiermee kun je tekst opmaken om meer structuur te geven, hyperlinks toevoegen naar externe bronnen of zelfs een codeblok of een afbeelding invoegen. Dit is erg handig voor content met veel tekst, zoals een blogpost of een artikel.

Als we de rich text willen weergeven op dezelfde manier dat we ze ingeven in de web app, dan hebben we een renderer nodig die alle verschillende stijlen aankan. In deze post gaan we kijken hoe de Contentful Android SDK deze data aanbied en hoe we deze mooi kunnen renderen.
Wat voorbeeld data genereren
Voor we onze content kunnen aanspreken in de android app moeten we deze voorzien. In de Contentful Web App maken we een nieuw Blogpost content model. Ons model bevat een Rich Text veld genaamd body dat we kunnen gebruiken voor onze blogposts te schrijven. Daarna gaan we naar de content tab en schrijven we een kleine blogpost.
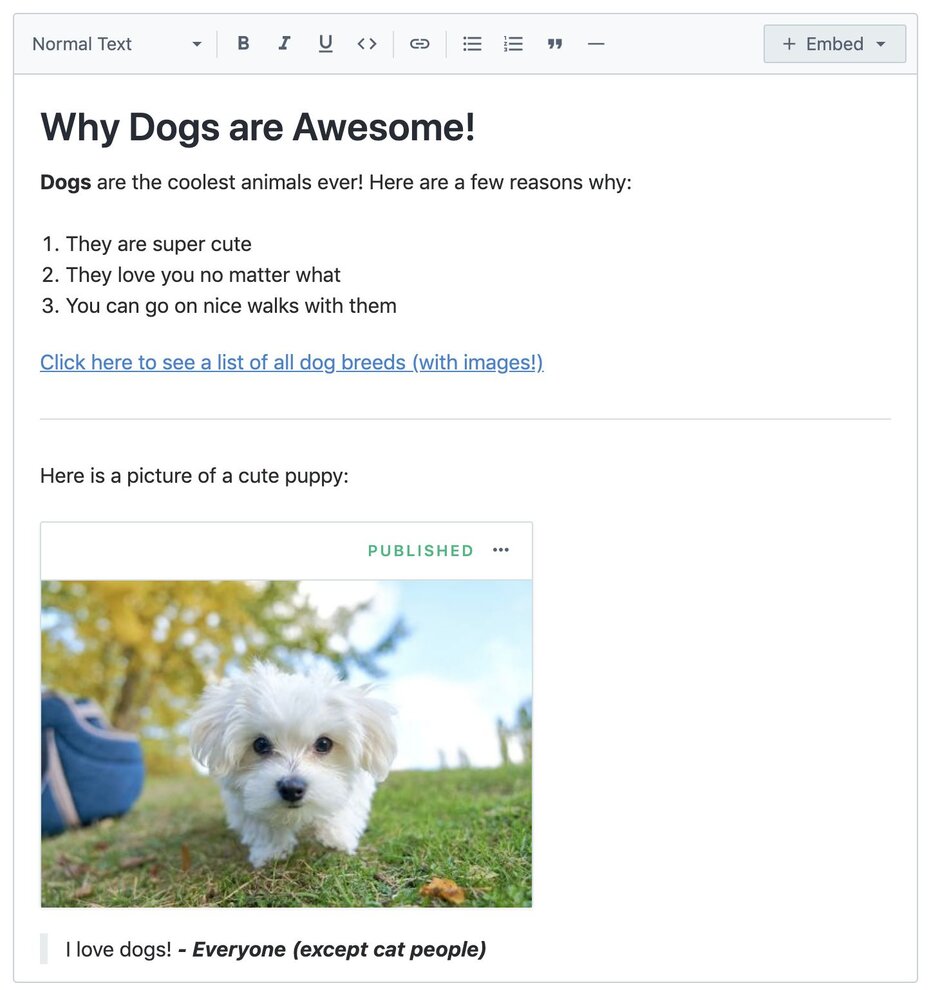
Als laatste publiceren we het bericht en is onze voorbeeld content klaar.
De data uitlezen in Android
Om onze voorbeeld content te ontvangen in android gaan we gebruik maken van de officiële Contentful Android SDK.
Onze data verkrijgen is makkelijk. Allereerst moeten we de Content Delivery API Client initialiseren. Daarna kunnen we deze gebruiken voor onze blogpost op te vragen. We maken ook gebruik van rxAndroid om ons te helpen met de asynchrone netwerkoproepen.
1// Building the CDAClient
2
3val client = CDAClient.builder()
4            .setSpace("{space-key-goes-here}")
5            .setToken("{access-token-goes-here}")
6            .build()
7
8// Retrieving the sample blogpost
9
10client.observe(CDAEntry::class.java)
11            .one("{entry-id-goes-here}")
12            .observeOn(AndroidSchedulers.mainThread())
13            .subscribeOn(Schedulers.io())
14            .subscribe({ entry ->
15                val body = entry.getField<CDARichDocument>("body")
16            }) {
17                Log.e("Contentful Error", it.toString())
18            }
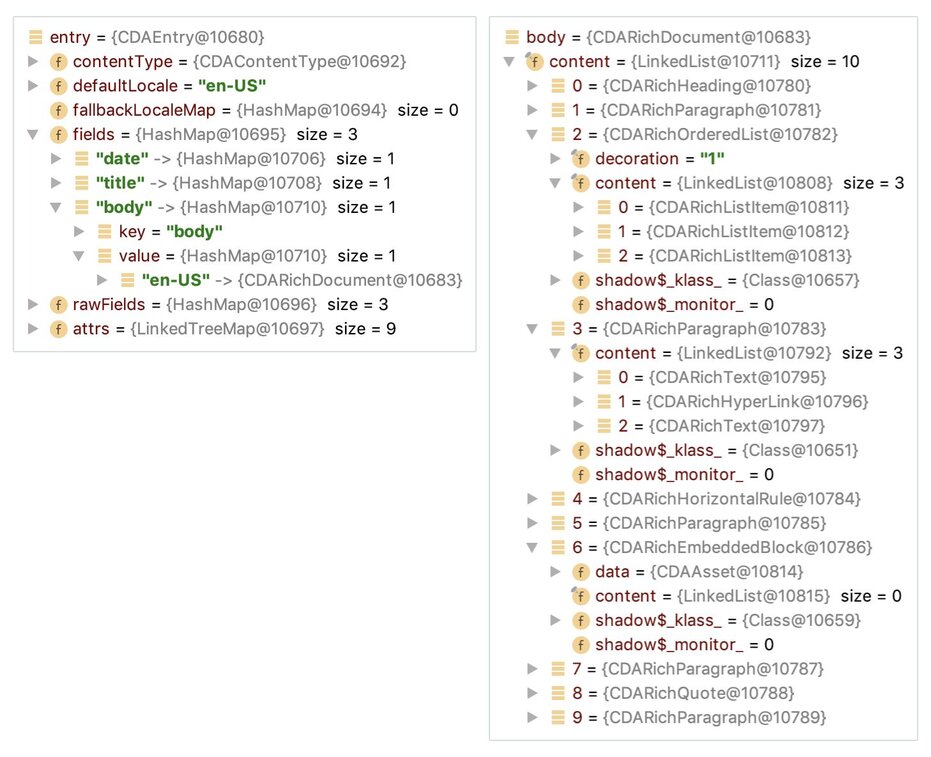
Als we een kijkje nemen naar entry, kunnen we zien dat het ons body veldje bevat met daarin een CDARichDocument object. Als we dan onze body uitlezen met behulp van de getField methode, krijgen we een lijstje met objecten voor al onze elementen. Onze blogpost structuur is duidelijk te zien met headings, paragrafen, lijsten, hyperlinks, quotes en foto's allemaal in hun eigen object type.
De rich text renderen
Nu dat we onze data hebben, moeten we deze weergeven. We zouden onze eigen mappers kunnen schrijven op zo de data te transformeren in views, maar dat zou heel veel tijd kosten. Gelukkig voor ons werkt het Contentful team zelf een een Rich Text Renderer voor Android.
Opgelet: Toen deze blogpost werd geschreven was deze library nog steeds in beta. De developers hebben wel onlangs gezegd dat ze de library productie klaar willen hebben in de komende weken.
Met deze library maken we een processor die ons toelaat om een CDARichDocument node te processen. We kunnen op twee manieren naar android renderen: via spannables of via custom views. We gaan beide manieren eens onder de loep nemen.
Spannables
Om met spannables te werken maken we gebruik van de sequenceProcessor. Deze gaat een SpannableStringBuilder genereren die we dan in een TextView kunnen gebruiken.
1client.observe(CDAEntry::class.java)
2            .one("{entry-id-goes-here}")
3            .observeOn(AndroidSchedulers.mainThread())
4            .subscribeOn(Schedulers.io())
5            .subscribe({entry ->
6                val body = entry.getField<CDARichDocument>("body")
7
8                val context = AndroidContext(this)
9
10                val sequenceProcessor = AndroidProcessor.creatingCharSequences()
11                val sequenceResult = sequenceProcessor.process(context, body)
12
13                textView.setText(sequenceResult, TextView.BufferType.SPANNABLE)
14
15            }) {
16                Log.e("Error", it.toString())
17            }
En hier is het resultaat:
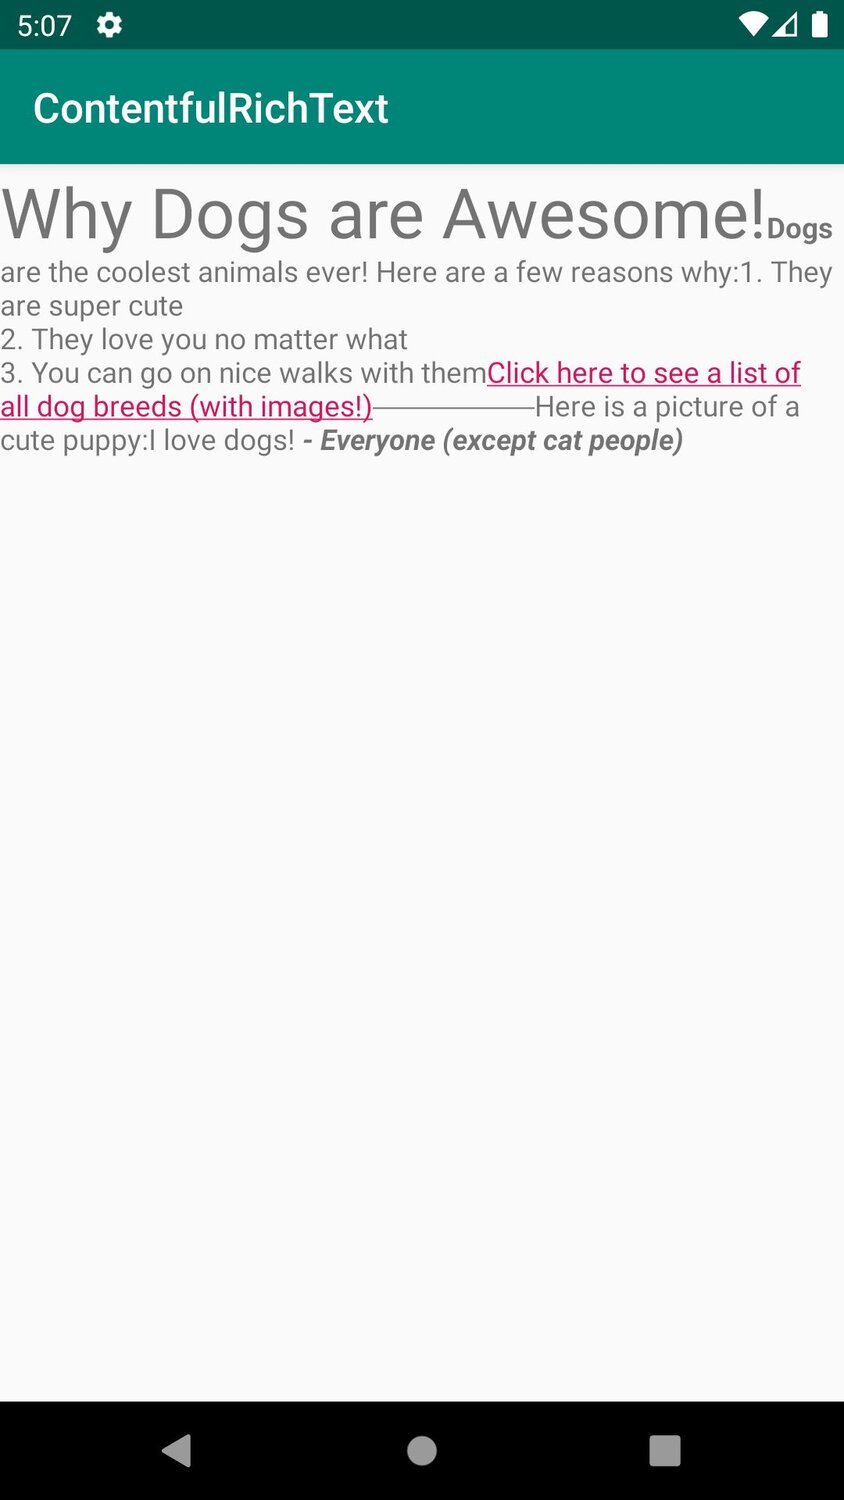
We kunnen onmiddellijk zien dat dit niet het resultaat is dat we verwachten. De meest opvallende problemen zijn:
- Alles staat op één lijntje. Er zijn geen regeleinden waar we ze verwachten.
- De foto wordt niet weergegeven.
- Hoewel de hyperlink er uitziet als een link, is deze niet klikbaar.
- Quotes worden niet weergeven zoals verwacht.
- Het horizontaal lijntje is niet de hele breedte van het scherm.
Met al deze problemen is deze methode ver van ideaal.
Custom Views
De library voorziet ook een viewProcessor die een LinearLayout vol met custom elementen voorziet. Laten we deze eens uitproberen:
1client.observe(CDAEntry::class.java)
2            .one("{entry-id-goes-here}")
3            .observeOn(AndroidSchedulers.mainThread())
4            .subscribeOn(Schedulers.io())
5            .subscribe({entry ->
6                val body = entry.getField<CDARichDocument>("body")
7
8                val context = AndroidContext(this)
9
10                val viewProcessor = AndroidProcessor.creatingNativeViews()
11                val viewResult = viewProcessor.process(context, body)
12
13                viewResult?.setPadding(30, 30, 30, 30)
14                container.addView(viewResult)
15
16            }) {
17                Log.e("Error", it.toString())
18            }
Deze keer ziet het resultaat er veelbelovend uit:
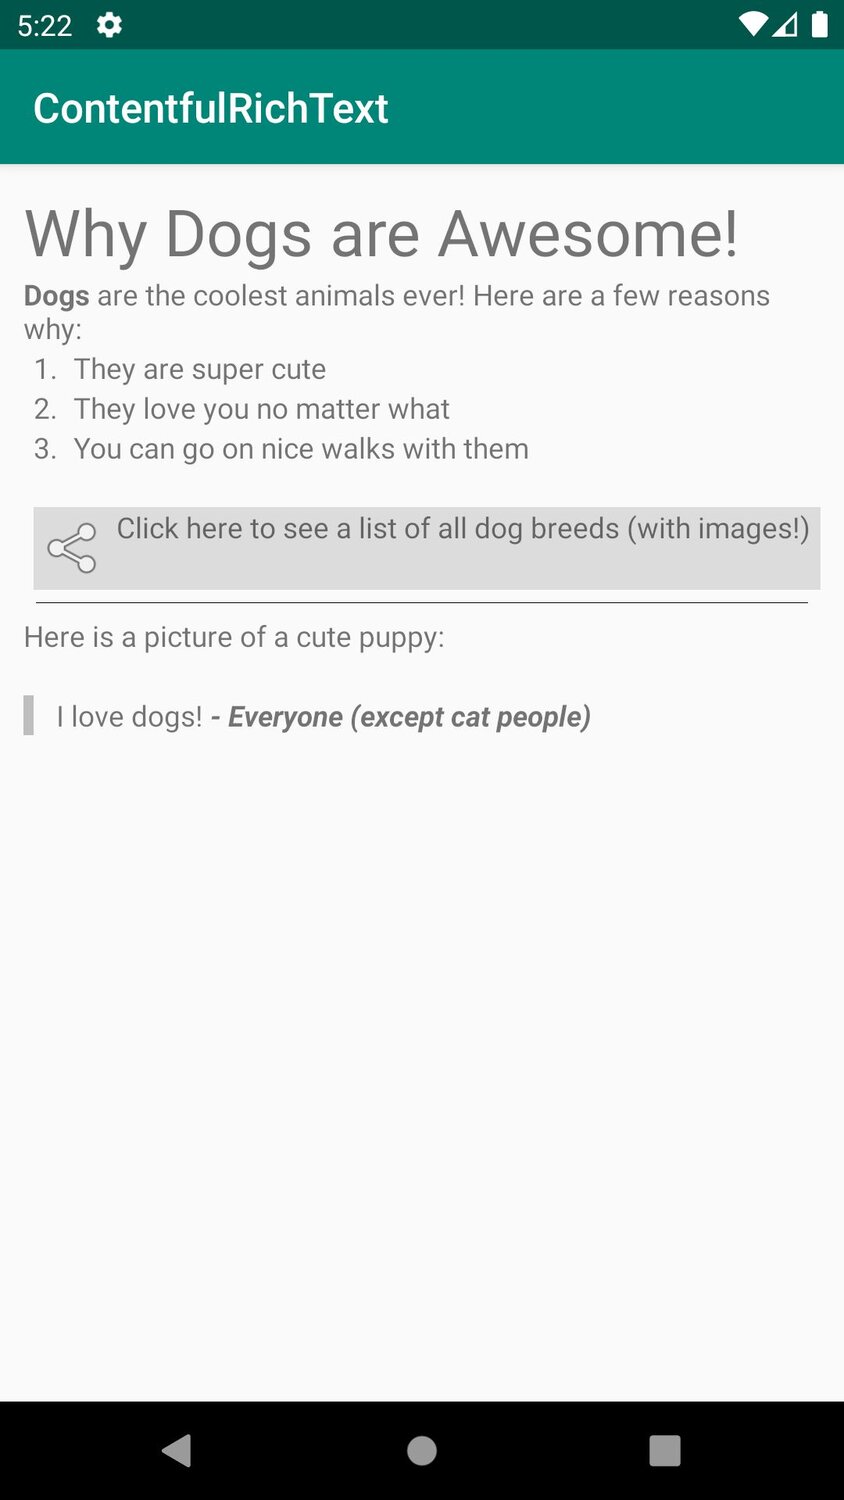
Er zijn wel nog enkele problemen:
- De foto wordt niet weergegeven.
- De hyperlinks zijn deze keer klikbaar maar hebben wel een aparte stijl.
De stijl van de hyperlinks is interessant. Laten we is door de code graven om te kijken hoe we aan dit resultaat komen.
De hyperlink code analyseren
In de AndroidProcessor code zien we dat de viewProcessor gebruik maakt van een NativeViewsRendererProvider.
1// AndroidProcessor.java
2
3public class AndroidProcessor<T> extends Processor<AndroidContext, T> {
4
5  ...
6
7  public static AndroidProcessor<View> creatingNativeViews() {
8    final AndroidProcessor<View> processor = new AndroidProcessor<>();
9    new NativeViewsRendererProvider().provide(processor);
10
11    return processor;
12  }
13
14  ...
15}
Door in de NativeViewsRendererProvider te kijken, zien we dat deze een aantal verschillende renderers aanroept, inclusief eentje voor hyperlinks.
1// NativeViewsRendererProvider.java
2
3public class NativeViewsRendererProvider {
4
5  public void provide(@Nonnull AndroidProcessor<View> processor) {
6    processor.addRenderer(new TextRenderer(processor));
7    processor.addRenderer(new HorizontalRuleRenderer(processor));
8    processor.addRenderer(new ListRenderer(processor, new BulletDecorator()));
9    processor.addRenderer(new ListRenderer(processor,
10        new NumbersDecorator(),
11        new UpperCaseCharacterDecorator(),
12        new LowerCaseRomanNumeralsDecorator(),
13        new LowerCaseCharacterDecorator(),
14        new LowerCaseCharacterDecorator(),
15        new UpperCaseRomanNumeralsDecorator()
16    ));
17    processor.addRenderer(new HyperLinkRenderer(processor));
18    processor.addRenderer(new QuoteRenderer(processor));
19    processor.addRenderer(new BlockRenderer(processor));
20  }
21}
In de HyperLinkRenderer kunnen we zien dat er een OnClick listener wordt toegevoegd die het effectieve doorlinken afhandelt. Ook zien we dat er een R.layout.rich_hyperlink_layoutwordt ingeladen.
1<!--rich_hyperlink_layout.xml-->
2
3<?xml version="1.0" encoding="utf-8"?>
4<RelativeLayout
5    xmlns:android="http://schemas.android.com/apk/res/android"
6    android:layout_width="wrap_content"
7    android:layout_height="wrap_content"
8    android:background="#40808080"
9    >
10
11    <ImageView
12        android:id="@+id/rich_image"
13        android:layout_width="wrap_content"
14        android:layout_height="wrap_content"
15        android:contentDescription="@null"
16        android:padding="4dp"
17        android:src="@android:drawable/ic_menu_share"
18        />
19
20    <LinearLayout
21        android:id="@id/rich_content"
22        android:layout_width="wrap_content"
23        android:layout_height="wrap_content"
24        android:layout_alignParentEnd="true"
25        android:layout_toEndOf="@id/rich_image"
26        android:gravity="center"
27        android:orientation="vertical"
28        />
29</RelativeLayout>
Deze layout komt overeen met hoe de links er uitzien in de app. Indien deze stijl niet naar jouw wensen is, biedt de library een manier aan om stijlen toe te voegen of aan te passen.
Renderers toevoegen of overschrijven
De processor heeft twee methoden om renderers aan te passen: .addRenderer(…,…) en .overrideRenderer(…,…). Beide methoden verwachten twee parameters die elk een lambda zijn.
De eerste lambda heet de checker. Deze functie geeft je een node en verwacht een boolean terug. Hij checkt of deze node door deze renderer moet afgehandeld worden. (bv: Is deze node een hyperlink? of is deze node een foto?)
De tweede lambda is de effectieve renderer. Deze geeft je een node en verwacht een view terug. Deze tweede lambda gaat enkel aangeroepen worden indien de checker waar is.
Het verschil tussen addRenderer en overrideRenderer is wanneer ze aangeroepen worden. addRenderer gaat onderaan aan de lijst worden toegevoegd, terwijl overrideRenderer bovenaan de lijst staat. Elke node activeert enkel de eerste checker die overeenkomt.
Een eigen foto renderer toevoegen
Laten we deze functies is uitproberen door een eigen renderer te schrijven die de foto's gaat laten zien. Zoals we al zagen in de body node, is een foto een CDARichEmbeddedBlock met daarin een CDAAsset. We moeten hier dus op controleren in onze checker. Om de effectieve foto in te laden gaan we Picasso gebruiken.
1viewProcessor.overrideRenderer(
2    // Checker
3    { _, node -> node is CDARichEmbeddedBlock && node.data is CDAAsset },
4    // Renderer
5    { _, node ->
6        val data = (node as CDARichEmbeddedBlock).data as CDAAsset
7        val imageview = ImageView(this).apply {
8            layoutParams = ViewGroup.LayoutParams(ViewGroup.LayoutParams.MATCH_PARENT, ViewGroup.LayoutParams.WRAP_CONTENT)
9        }
10        Picasso.get().load("https:" + data.url()).into(imageview)
11        imageview
12    }
13)
We gebruiken hier overrideRenderer en niet addRenderer. Dit komt doordat onze foto node de checker van de default BlockRenderer activeert. Hierdoor zou onze renderer nooit aangeroepen worden indien we addRenderer gebruikten.
En als we kijken in onze app dan zien we dat nu de foto ook getoond wordt:
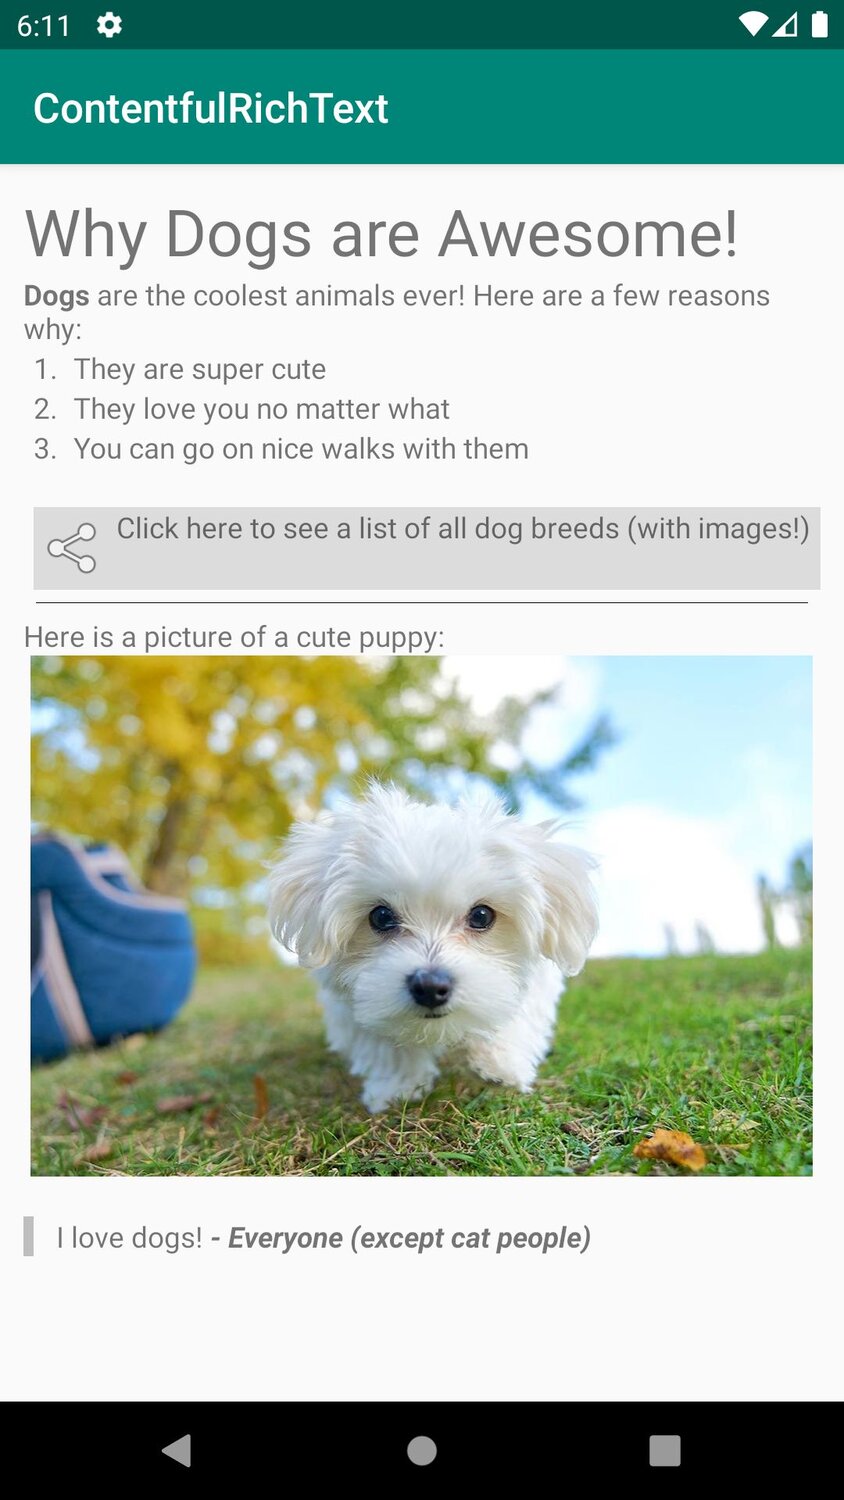
En dat is het!
We kunnen nu Contentful Rich Text velden weergeven in android en weten ook hoe we elementen kunnen toevoegen of overschrijven als we ze er anders willen laten uitzien.
